Sunday, September 14, 2014
The edge
The harvest is really picking up now. This year I'm growing pickling cucumbers. Our usual recipe makes a very strong pickle, sharp with vinegar. It's easy, robust and long lasting but it does make your mouth pucker up. Even if it's in a good way, these very piquant pickles are limited in their uses and not for everyone.
The answer is to make the sort of pickles known as the half sour. These are fermented in brine and their own juices producing a lactic acid cured pickle that is sour without the vinegar strength of brewed condiment. However, making these old fashioned fermented pickles isn't without its difficulties. I've shied away from them in the past because I don't want to die of botulism or have to throw out tubs of foul and rotting vegetables when something goes wrong. Chiding myself for being a wimp, this year I've taken our lives in my hands and made some anyway.
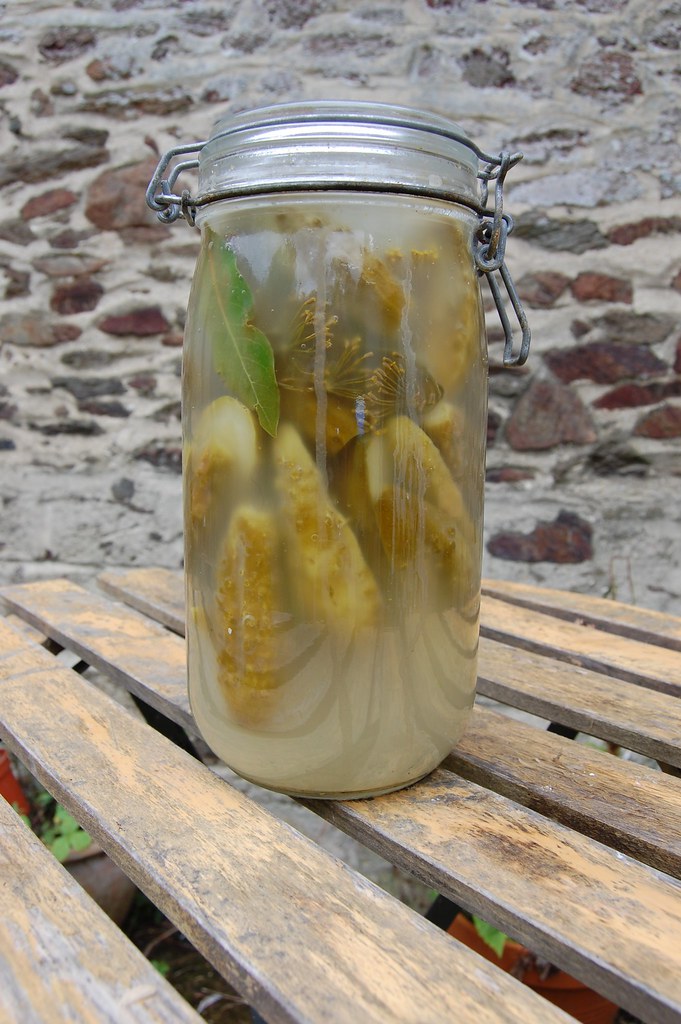
There are plenty of recipes in books and on the web. With the best of my understanding of the science behind it all this is the trial recipe I've made for our first couple of litres of dill cucumbers.
1 litre water
50g sel de guerande
60ml cider vinegar 5%
1 head dill
1 bay leaf
1 grape leaf
grind of mixed pepper and coriander.
Enough small (about 10cm long) pickling cucumbers to fill the jar.
(large ones can be cut into spears if needed)
Make a brine by mixing the cold water with the salt and vinegar. These proportions are quite important, the salt and vinegar work together to allow the beneficial bacteria to reproduce whilst inhibiting the undesirables. The grape leaf also has its part to play in this so include 1 or 2 per litre of brine if you can.
Clean cucumbers thoroughly, paying particular attention to the flower end. Trim a tiny sliver from where the flower was. This is because the enzyme which causes the fruit to decay is in its highest concentration at this point. If you have some bigger fruit divide into smaller sections so that the length and thickness of all the pieces is similar. This makes sure that everything will pickle through at about the same time.
Pack cukes into a 2 litre jar, no rubber ring, interspersing with the leaves and spices. Then fill up with brine. Reserve spare brine for topping up. Close lid and set to ferment. Do not seal the jar. It's important that air can get in. A sealed jar may explode and/or encourage the formation of unpleasant things like botulism spores. You really don't want that.
To hold the cucumbers under the liquid improvise a glass jar or small plate as a weight or use a strong plastic bag filled with brine at the same concentration and sealed as a bung.
Sit the jar in a plastic container in case of spills. After two or three days at room temperature small bubbles will start to form, the liquid will become cloudy and the cucumbers will change to an olive green. Expect to have to clean scum from the top of the jar and from around the weight each day. It's a bit gross but as long as the cucumbers are beneath the brine and nothing starts to smell unpleasant all is well. Add some of your reserved brine as necessary to keep the jar full of liquid.
After five days to a week the pickles will be cured right the way through and if you cut one open there will be no white or 'unpickled' parts visible. You can eat it now!
Clean up the jar, top up again with more brine if necessary and store without air tight sealing in the fridge. The pickles will be at their best after about 10 days and should be finished up within the month. If you want longer keepers it is possible to heat treat them but I'm not the woman to ask about that.
I do find this quite scary but the actual pickles are very nice to eat and I'll be continuing to experiment throughout the summer.
Monday, July 07, 2014
Jam
Time was I would have placed this recipe on the other blog as although the fruit isn't foraged it's not the sort of thing you'd be likely to obtain on any market. However, entries here are a bit sparse and to be honest this is some of the closest I've come to real cooking for quite a while so here it stays.
This year a shrub in my garden has had an excellent crop of berries. The plant is Mahonia x media Charity which is sometimes known as the Oregon grape. I prefer not to use that name as the parents of this plant originated between China and Burma and have no relation to Oregon at all. The true Oregan grape is Mahonia aquifolium and for the purposes of the recipe there is very little difference in the two plants for fruit, I'm just a pedant.
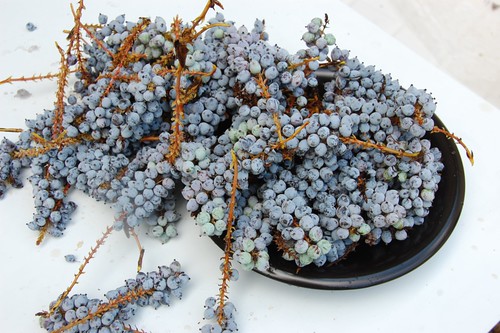
Anyway, the flowers come out in the autumn and any fruit set is mostly lost over the winter. This year it was a very mild winter and there are lots and lots of these racemes of little purple berries covered in a waxy white bloom that leaves them looking rather ethereal, or a bit like grapes if you're more prosaic.
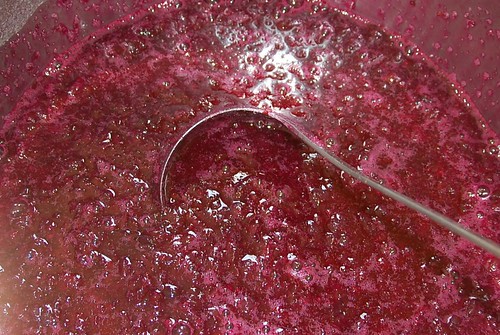
Of course, the rain was tipping down when I decided to harvest some and so I took a bare minimum before giving up the battle. The picture at the top shows, I think, on mature reflection, about 600g (1.3 lb) but I didn't weigh them.
Rinse the fruit. Strip the berries off the little stalks, I used a fork as you might for red currants and place in a large stainless steel saucepan with just enough water to reach the top of the berries, no need to make them float.
Bring to a boil and simmer gently for 15-20 minutes until soft. Now you have a choice; my original plan was to make a jelly and I still think this is a good idea as the colour is lovely and it would be a fine product but (and this was my mistake I'm hoping you'll learn from) after carefully mashing and straining the fruit to collect clear juice I looked at the luscious pulp, had a taste and decided the seeds weren't too bad really and the waste of the fruit criminal so I mixed them back together again and went for jam.
There is a third way which is rub the whole lot through a mouli or sieve which would homogenize everything and remove the seeds but I didn't do that.
Add sugar, 800g per litre of pulp+juice (1lb per pint (20 fl.oz.)) and stir until fully dissolved. Bring to a fierce boil and cook for 10 minutes or so. There is loads of pectin in these babies so a set is guaranteed without stress. You could play with that ratio and drop the sugar content a bit if liked. The jam might not keep as long but there are other benefits, like being to eat more of it at a sitting.
Because of the change of plan from jelly to jam I'd not prepared enough clean jam jars to take the considerable yield of conserve. Don't be me, for that much fruit you'll need about five 400g/1 lb jars.
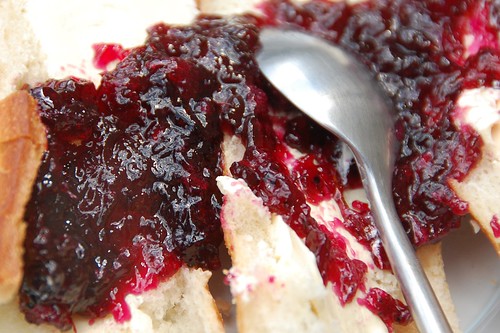
So what does it taste like? Fruity, very pleasant and rich but not distinctively enough for instant identification. Given the excellent set and subtle flavour it might be useful to add a handful of these to other lower pectin fruits like strawberries to improve their texture.
Mahonia Berry Jam
-----------
600g Mahonia berries, stripped from their stalks
1kg sugar
Large preserving pan (needs to be big as jam boils up high)
5 x jam jars, sterilised with clean good lids
-----------
Put the berries in the pan with enough water to just cover them. Simmer for 15-20 minutes until soft.
If making jelly strain the pulp through a jelly bag, discard the fruit detritus and measure the juice (you'll have about 700ml for this quantity)
If making jam, measure the pulp and all its liquid. This was about 1400ml for me.
Add sugar in ratio 4 parts sugar to 5 parts fruit (therefore 560g sugar for jelly, 1100g sugar for jam)
Stir to dissolve the sugar over a gentle heat, bring to a full boil and cook, stirring carefully and occasionally, for about 10 minutes. Test for setting and boil a little longer if needed (but I very much doubt you'll need to). Divide into the jars and seal immediately. Provided the seal is good these will keep a year or more without further processing.
-----------
Thursday, May 01, 2014
Tuesday, March 04, 2014
Piedmont Peppers
We went to the Gate, Hammersmith a few days ago. I've given up writing reviews of restaurants because it's usually a social occasion that gets me out of the house and it's difficult to reconcile my natural enjoyment of being with friends and being a good guest with my (apparently) unrelenting standards when it comes to the food and ambience of the venues. My expectations of catering establishments are probably a bit higher than they should be, in other words, I'm really quite a picky food snob. So, let it go.
However, there wouldn't be a blog post without me expressing some sort of personal opinion and so it was that when I read the menu I was surprised to see the old stalwart of Piedmont peppers nestling in amongst the starters. These are inextricably linked with Delia Smith who popularised them on one of her early cookery programmes and I'm afraid they suffer as a consequence in my mind but actually it was the sainted Elizabeth David who is credited with bringing the recipe into the canon thirty years earlier than Ms. Smith so I suppose I should rein in my sniffs of disapproval. Even so, it still seems like an odd choice for a modern restaurant.
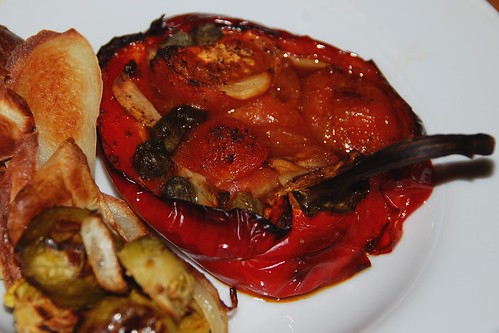
Reader, I chose that starter, just to see if they'd put a twist on it - the original recipe contains anchovies so it had to have been modified for a vegetarian clientele. As far as I could tell, they'd replaced the fishy umami with a paste of tomato puree and sun dried tomatoes which gave a good solid stuffing to the peppers, albeit a little one paced, but I was disappointed that the cooked pepper itself was still rather crunchy and given the lusciously soft finish of the traditional dish seemed undercooked as a result.
A niggle is as good as a shove to the discontented, so I made some at home so that Mr. Stripey could enjoy them as they should be with me. (He'd had some sort of tempura artichoke while we were out, how I envied him.)
Piedmont Peppers for vegans.
serves 2
2 large red peppers, thick walled.
4-5 medium well flavoured tomatoes
Tomato purée if needed
Olive oil
Garlic
Capers
Black pepper
Slice the peppers in half lengthways to make four pepper boats and arrange in a sturdy metal baking tray with sides to catch the juice (or face cleaning your oven later!)
Slip the skin off the tomatoes and remove any tough cores at the stem end. I've wondered about using good quality tinned tomatoes during the winter when fresh ones are so insipid. If you did try that pierce the fruit and allow them to drain for a bit before using otherwise they will be too wet. As it was I had fresh tomatoes and put half a teaspoon of tomato purée in the base of each pepper half before filling with the rest of the ingredients.
Slice the tomatoes into quarters or eighths if very large and use them to stuff the pepper halves, then arrange slivers of garlic, as much as you like, between the pieces of tomato. I used capers as an alternative to the anchovies but I can't see why some shreds of good black olives would be out of place. Season with freshly ground black pepper and then put a dessert spoonful of good olive oil into each filled pepper. Add it slowly so it fills the cavity and doesn't just run off over the sides.
Bake uncovered in a hot oven, about 200C, for an hour until everything is deliciously soft, starting to caramelise and the pepper's juices are mingling with the oil.
Serve warm or at room temperature with bread, or as we did with oven chips and green vegetables.
Friday, January 17, 2014
Run Rabbit Run Paella
First published Monday, 6th October 2008. We had paella as one of the dishes during the festive season, it was just like this and very good.
~~~~~~~~~~~~~~~~~~~~~~~~~~
This morning I watched a rabbit haring across the yard. I'm guessing s/he was avoiding the hunters, out in force, well all the time it seems but certainly from sun up. The sun is just going down now and I can still hear shots. I'm rather hoping they're shooting at the rude mushroom pickers who invaded my patch an hour ago but that might just be a little too serendipitous.
Anyway, I was taught how to make paella, in Valencia, by locals and they positively searched out the boniest bits of rabbit and chicken to start their cooking because paella is a poor persons' dish and nothing but the scrawny bits of animal would give the right flavour apparently.
And what about the poor animal? A shrug. Animals are for eating, if you can get hold of one. However, they did concede, that if you were very poor (or mad) you could make a reasonable paella without the killing, because the really really essential parts of the meal were the rice, beans and saffron. The rice should be a shorter grain, the Spanish have their own rice which is ideal but risotto or even round rice will do. The saffron should be as liberal as you can afford.
In honour of my small friend Peter (or maybe Petra?) I decided to make paella for my dinner.
It's the easiest thing in the world to make, ideal for sharing and great for picnics if you have a knack with a fire (or one of those handy gas rings).
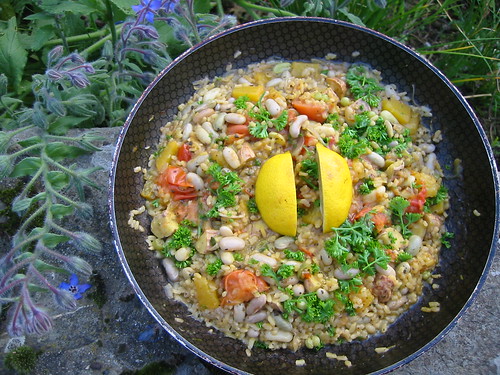
For this one I fried off a small onion, some garlic, a handful of chopped pumpkin pieces, enough rice (a bit too much in fact for one, but it'll be fine for breakfast) and some rosemary, then added enough boiling water to cover. Give it all a stir.
Add some beans. I had fresh shelled haricot. If you need to use dried beans they'll need cooking before you get to this stage. Frozen ones are fine.
Chuck in the saffron. I never bother to soak it first, but you might if you wanted to. Make sure to put the soaking water in the pot too! Other herbs you might add are oregano or basil. I also popped in a little lemon thyme which was rather nice but don't overdo it.
Then to mimic the Spanish habit of including found food (like snails for example) in went half a dozen fresh chestnuts, peeled and chopped into quarters, a small handful of green nasturtium seeds and a couple of mild green chillies chopped up. A few mushrooms wouldn't go amiss in this autumnal selection but I didn't fancy them. Season with salt and pepper.
Let everything cook, stirring from time to time until the rice is tender and moisture nearly gone. You may have to add a little extra water during cooking if it's drying up too quickly. Five minutes before you estimate it will be done, add a couple of tomatoes cut in wedges and just before serving stir in a big handful of chopped parsley.
Serve with lemon wedges and eat with a spoon from the pan.
Friday, January 03, 2014
More of a ramble than a blog
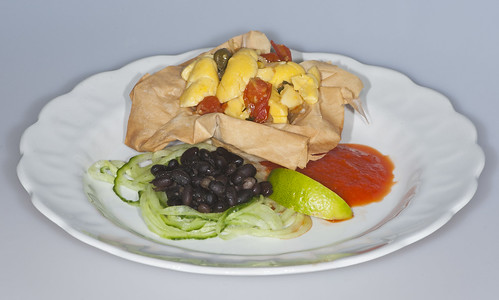
It's proving harder than I expected to get back into this. On New Year's eve I planned a sumptuous three course meal but the arrival of welcome visitors at the last minute morphed it into several bottles of wine and a single course from the plan. We took pictures, one of which is above, a West Indian inspired collation originally planned as a smaller plated starter. Filo (fillo, phyllo?) pastry tartlets filled with ackee, served with a hot and sweet red pepper sauce and salty black beans seasoned with toasted sesame oil on a bed of shredded cucumber.
Immediately revealed are two things that need improving. For a 'posh' dinner this has more of the presentation style of the 1980s than this century. Secondly, there isn't really a publishable recipe. All the individual components are very simple concoctions of a small range of pantry ingredients, out of the box cooking for ease and convenience. To meet my own expectations for the blog with satisfaction it's going to take a bit more dedication to detail which in turn has to be something is enjoyably inspirational for a blog post - a circular set of dependencies that's going to need a crank handle to get going.
Still, one of my presents has just that very thing. A spiral vegetable cutter which does just what it says it will do with the added bonus of amusingly shaped bits of leftover vegetable to give a puerile snigger at the end of work.
Not a new tool for many of course but it's fun to use and handled with restraint will add something novel to our meals. I'm looking forward to trying out some established techniques and seeing where else it can be applied.
Subscribe to:
Posts (Atom)