Sunday, November 08, 2015

Late to the party

aquafaba meringue

This is hardly cutting edge now, the world and his wife have already heard the news about chickpea cooking liquid, renamed by some as the rather fancier aquafaba, and its unusual ability to whip up like egg whites.

I've tried a few times before to create simple meringues but failed each time during the cooking process - it's easy to make a wonderful fluffy white cloud of sweetness, if you have a good food processor to do the necessary whipping, but a crisp shell of loveliness seemed just out of reach.

Still all cooking is a procedure of refinement - I think  my first effort failed because I was using a cheap toaster oven with poor temperature control and my second because I'd tried a different proportion of liquid to sugar and the whipped chickpea juice simply couldn't hold the concentration of sugar. The meringues were weeping before they'd had time to set.

Back in the UK with a better oven, precise scales and a desire to ignore each and every recipe that calls for cups of ingredients the formula seems to have been staring me in the face all along.

It's not perfect yet. I do so want to understand why the chickpea juice works as it does. It's a property of legume proteins and sugars which could probably be recreated without the need to use a by-product of cooking pulses, even if there is a sort of analogy with the dividing of yolks and whites in the traditional egg based methods. I particularly don't like using liquid from commercially canned goods but have so far found the extra effort of cooking dried chickpeas just for the cooking broth a bit too much for me. Perhaps now I've made something I'm happy with that step won't seem like such wasted effort.

So without further ado I give the almost 100% perfect method of making vegan meringues. They don't keep very long so make them the day you intend to serve them and keep them very dry in storage.

100g chickpea cooking liquid (aquafaba). This is about the amount you get drained from a 400g tin of chickpeas.
100g fine granulated sugar. I used caster sugar today but granulated will work.
1tsp vanilla essence.

Heat the oven to 100C. Line a baking tray with parchment paper.

Beat the chickpea liquid with an electric rotary whisk, the egg beating attachment of your food processor or (in my rather froopy French processor) the beating plate until it is stiff and shows sharp peaks. This will take some minutes (unless you have the French thing).

Add the vanilla essence and then little by little the sugar while the machine continues working, pausing between each addition to allow the sugar to be absorbed. It will become glossy but should still be very stiff.

When all the sugar is added you're done. It tastes good like this as a creamy marshmallow-like topping or it could be used as a meringue layer for a pie; baked in the oven until nicely browned and squidgy inside. For meringues spoon or pipe the mixture in small mounds on the parchment. It doesn't spread far so they can be fairly close together. You should get 14-16 pieces. If you make them too thick they may not set properly and so if you want a large single cake for a pavlova smooth it down so it's not more than 15mm thick.

Now I really wanted to say "bake for 100 minutes" to complete my 100% theme but the truth is you need to give them at least 150 mins (2.5 hours) at this very gentle temperature to become crisp and fully set. Allow to cool for another 30 minutes in the oven after you turn it off.

Serve with your favourite toppings.


Tuesday, September 22, 2015

Moar courgettes

The season is nearly over and the plan hasn't been very well adhered to. Before it's too late here is my truly favourite way to make a courgette edible and fit for friends and that's griddled.

courgettes sliced

It's barely a recipe, cut your courgettes into neat slices however you think is most attractive. Don't use any that are too seedy if looks are important, guests expected or anything like that because they tend to fall apart during cooking but otherwise any courgette that still qualifies for the name and hasn't become a marrow will do nicely.

courgettes on the griddle

Get the griddle nice and hot and brush a little oil on one side of each courgette slice, which is then placed oil side down on the hot pan. Leave them, probably for several minutes (reduce the heat under the griddle if necessary) until there's a really nice set of toasty lines on a test piece then lightly oil the uncooked sides and turn them over to repeat the cooking on the second side. I told you this was easy.

courgettes dressed and ready to go

Arrange on your serving dish and dress to taste. A really garlicky lemon dressing is delicious but I made a classic French dressing for these with added grainy mustard. It's your choice.

I have a couple more courgette recipes waiting around, personal favourites not trials from elsewhere, for soup and a marrow ginger jam but who knows when they'll appear. Bon appetit.

Monday, September 07, 2015

Ketchup catchup

I haven't quite finished with courgettes yet, and I'm sure I'll miss them when they're gone but I've been dealing with another rather more welcome glut; of tomatoes. There were several tomato ketchup / sauce recipes on the blog now archived and this one from 2008 is typical of the recipe I've been using this time.

First published 3/9/2008 A load of balls
==============================================
balls up

Tonight's dinner was such a failure that I really didn't want to share it but decided in the interests of painful truth and transparency to admit that once in a while I make a small error, sometimes, maybe, a bit.

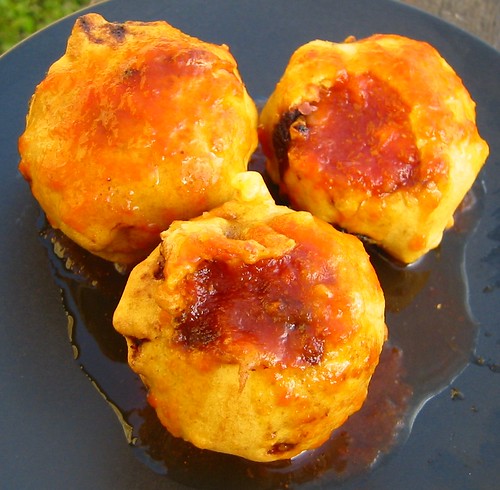
If I were to tell you how I made these I'd have to kill you but if you're determined to have a go set your search engine for Bondas, for it was these delectable treats I based my disaster upon. My advice? Don't try to use up leftovers, it'll only end in tears.

However, having made my supper I ate it and what made that possible was the coating of sweet spicy tomato sauce I poured over the deep fried lumps while they were still hot.

In fact, I've spent a long time working on this sauce or ketchup or even, if you like, tomato jam as part of the autumn task of preserving the tomato crop for winter.

It's a lot of work for a scant 800ml* of sauce but the flavour is good. If you have a lot of tomatoes, or they're cheap at the market give it a go. You have only most of the day to lose.

Sweetly Hot Tomato Ketchup.

2kg tomatoes, green stems and bad parts removed.
25g or so fresh ginger root, grated.
4 or 5 cloves
Cinnamon stick, about 4 cm.
Dried red chillies, to taste. I used three.
4 cloves garlic, crushed.
15g salt

250g sugar (white is fine)
250ml 6% vinegar (I used a red wine version because I'm in France but white malt would do)

Put everything except the sugar and vinegar in a pan, put the lid on and bring to a simmer over a gentle heat for 45 minutes or so. The tomatoes will release their juice and cook in it. Allow to cool with the lid on the pan.

Run the whole lot through a mouli or food mill (or press through a fine sieve) to remove the tomato skins, lumpy bits and spices. You will have a quantity of thin, flavoured tomato juice.

In a cleaned pan, put the juice, sugar and vinegar and bring back to simmer. Stirring frequently, allow to reduce until the spoon leaves a short lived clean line on the bottom of the pan after a straight stroke. The sauce should now be about the thickness of ketchup. This may take a couple of hours or more. If the heat is too high and your attention is distracted it will probably burn. Bottle into hot sterilised jars and seal with vinegar proof lids immediately. Should keep for a year but probably won't as it gets eaten very quickly once opened.

* It might not have been quite such a meagre yield had I not raided the pan to douse my Bondas, but a girl has to eat.

Thursday, August 20, 2015

Nip them in the bud

open flower

It seems the much revered Nigel Slater has decided to jump on my bandwagon with a courgette recipe in the Guardian. I quite like the boy, I've even bought one of his books if only to give away, and although I might give his effort a try, for me it falls into the category of why bother. Like all recipes where a bit of courgette is added to a winning recipe be it brownies, pasta sauce or in this case latkes and found to be good one wonders how much better the dish would be /without/ the courgette.

No, I've decided the only way to tackle the green menace (or yellow if you're fancy) is to catch them young, tie them in a bag filled with rocks and throw them .... no, no, no. Is to catch them young and cook them while they're small, tender and you can use up whole handfuls of them in one meal.

Stuffed courgette flowers, with or without a baby courgette attached are actually considered rather desirable, posh food for guests, worth going to a restaurant to enjoy without having the bother of making your own. And they're a delicacy easy to obtain from your own garden.

Pick the whole thing, fruit and flower (you can take fresh male flowers too, it's all good) as the flowers open so gloriously for the first time. Best picked just before use but if the weather is warm and they're needed for the evening pick them early and keep in the cool until you're ready.

before stuffing

They shouldn't need much cleaning, shake out any insects and wipe the courgette part with a bit of damp kitchen towel. Carefully remove the style - the sticky up bit in the middle of the flower - which is easiest by nipping it out between finger and thumb but by all means use scissors or a sharp knife if you prefer. Try to keep the petals as unbroken as possible.

It's not necessary to slice and fan the baby fruit as I have done in the picture but it was once done like that for me when I had them in a fashionable restaurant at an impressionable age and so I always do them that way. It has some merit, allowing the vegetable to cook through more quickly.

tempura prepped

As a starter or light snack you'd only need a couple per person and since they're deep fried it's probably better to do just that but I don't get the fryer out very often when I'm home alone and decided to indulge myself completely. In the picture then a couple of field mushrooms picked from the lawn, some entirely without heat chillies which are excellent for wimps like me and some pickles. I blame the Americans for that.

You don't have to stuff the flowers although it's often done; usually with a ricotta based stuffing. Make your favourite vegan alternative from commercial products or cashews or go off-piste as I did with an ad-hoc (this is a very verbose post!) mixture of what have you. I had some cooked green beans cut small with some grated vegan cheesley and some finely chopped sage bound with a little soya yoghurt. Seasoned with plenty of pepper it worked much better than I expected.

Fill the flowers carefully with a teaspoonful or two of your mixture and gently twist the ends of the petals closed around the stuffing. Don't overfill.

Make a batter to taste. I would recommend the sort of Japanese tempura batter made with rice flour and chilled sparkling water with a few crushed rice noodles stirred through but I only had brown flour and beer lightened with a little gram flour (besan) and made quite thin.

Heat your oil to a medium heat so that the vegetables will cook before the batter burns, dip your veg. into the batter, swirl to coat and allow the excess to drip off before settling them in the oil and frying until golden and crisp. Remove from the oil, drain briefly on kitchen paper and serve immediately. All that greasy goodness will need a dipping sauce, chutney or some nice fresh salsa with it.

That's the way to do it.

fried


Wednesday, August 05, 2015

Spiraliser

the elephant

The project could be going better. These are just a few of the ones that got away, the elephants in the room which I can't bear to acknowledge, without dissimulation, the marrows.

Today I decided to attack the problem with sharp blades. You'll see a lot of courgette noodles or spaghetti on the internets. They are the darling of raw foodies, dieters and those utterly weird people pursuing the paleo diet. How anyone could imagine that hunter gatherers had time to turn their veg into shreds confuses me but I don't have to worry about that because I am of the modern age and the modern age has spiralisers.

Even so, I have a bit of a problem with raw courgette - there's something about them that my insides just don't like and it's rare to find a recipe that will allow me to eat them with equanimity. So I chose a sauce that would, like the lime juice on ceviche, provide a gentle modification to them similar to cooking.

courgettes and sauce

A single eight incher (that's about 20cm) if you'll pardon the expression was enough for the two of us. If you don't have a spiraliser you're probably stuffed for this recipe but desperation and a sharp peeler might do the business adequately.

The sauce is a very loose interpretation of a saté sauce, made with peanut butter, tomato passata and a little chilli oil, ginger and garlic but worked well to mask the courgette flavour. On the other hand my companion, the erstwhile Mr. Stripey, claimed to quite like the subtle and complex flavours of the raw vegetable although it didn't stop him finishing the sauce with a spoon.

inna bowl

Serve with bread and a fizzy wine for the full Normandy experience. I'd do it again but not soon.

For:
1 20cm courgette, spiralised or shredded finely

Sauce:
1 tablespoon of peanut butter
1 tsp grated ginger
1 small clove of garlic, crushed finely
1 tbs. wine vinegar
Juice of half a lemon
Splash of toasted sesame oil
Smaller splash of chilli oil (or to taste)
100g good passata
Salt as needed.

Mix everything for the sauce except passata and salt together until it is smooth, then add tomatoes, mix well and salt to taste.

Combine sauce and courgettes at the table or the courgette will release moisture and make the sauce too wet.


Saturday, July 25, 2015

Utterly Simple Pie

You'd think that having some visitors would help control the courgette mountain but the Stripey kittens, for it was they, are not huge fans of the vegetable. The boy kitten went so far as to say he hated the wretched things and would not eat them.

I ignored that and made this regardless. We had the extra benefits of a greater variety of herbs to flavour it and hunger being a fine sauce for appetite it was all eaten up, even by the courgette hater. Simpler really is best.


First published in August 2009 Something for the Courgettes
============================================


plated pie

This year, I thought cleverly, I'll only have one courgette plant. That way they will never overwhelm me. How stupid was that! Even with two of us here we are slowly being taken over by sinister cucurbits. Last night it was time to take action.

They make an easy and light family meal if you slice them thinly, sweat down with an onion and herbs until softened and toss in a handful of chopped fresh tomatoes or mushrooms, whatever you have.

Put them into an ovenproof dish and top with mashed potato. Cover the mash with grated vegan cheese, breadcrumbs, crushed nuts or nutritional yeast, any, all or a mix of what you fancy and a drizzle of oil. Then cook in the middle of a hot oven until golden and fragrant.

Serve with green beans (thistle fluff optional!) and a nice Chablis.

Something for the Courgettes

plated pie

This year, I thought cleverly, I'll only have one courgette plant. That way they will never overwhelm me. How stupid was that! Even with two of us here we are slowly being taken over by sinister cucurbits. Last night it was time to take action.

They make an easy and light family meal if you slice them thinly, sweat down with an onion and herbs until softened and toss in a handful of chopped fresh tomatoes or mushrooms, whatever you have.

Put them into an ovenproof dish and top with mashed potato. Cover the mash with grated vegan cheese, breadcrumbs, crushed nuts or nutritional yeast, any, all or a mix of what you fancy and a drizzle of oil. Then cook in the middle of a hot oven until golden and fragrant.

Serve with green beans (thistle fluff optional!) and a nice Chablis.

Sunday, July 19, 2015

Middle Eastern Style Courgette Dip

A mere 24 hours later and I emerge sweaty and exhausted from a tussle with the killer cucurbit.

steaming courgettes

A courgette dip or spread seems like a practical use for the monsters, at home on a mezze table or as a filling for sandwiches and I've collected a few versions of recipes for this over the years.

The simplest form is just to use the courgettes in place of the chickpeas in hummus bi tahini, more popularly known as Hummus or Chickpea dip and widely available in various ghastly spritzed up versions all over the world. Call me old fashioned but the simple original is best for chickpeas, courgettes may need a little more help.

Ingredients:
750g courgettes, peeled or not, your choice. I liked the extra sprinkles of green produced by leaving it on.
50g tahini (or in my case, smooth peanut butter, I'm sure tahini would be better)
Juice of 1 lemon
1 large clove of garlic, mashed
Green chilli to taste (French chillies are very mild)
Pinch of cumin seeds
Salt to taste
Olive oil, chilli flakes, onion rings to garnish.

Method:
Chop the courgettes into chunks and place in a steamer. Allow to cook for about 15 minutes until they are softened and pierce easily with a knife. Leave to drain and cool.
   
Throw the flavouring ingredients into the food processor. It helps to mash down the garlic with the salt first to avoid lumps later. Feel free to add more garlic if that's your thing.

Add the cooled courgettes to the processor bowl and process until your preferred texture is achieved. I left mine a little less than perfectly smooth for interest.  To be honest despite cooking by steaming the courgettes were still a bit wet. You might usefully squeeze the moisture from them before processing to make a thicker more pleasing dip.

Test for seasoning, adjust as necessary (more salt, more lemon perhaps) and spread into a wide bowl. Drizzle olive oil on the surface and sprinkle chilli flakes and fine onion rings attractively. I used some chilli oil which worked well.

m'tabbal koosa

It's quite nice. Trouble is this made shedloads, at least six times the amount in the picture and you'd need a whole party to dispose of it.

Ideas to consider for next time, if there is one. Char grill the courgettes before blending and consider using a touch of mint in the flavourings, I think that might add a cool note that would give it a bit of distinction.

Saturday, July 18, 2015

Summer of Doom

courgettes

It's barely started and already the courgettes (or zucchini if you must ) are beginning to overwhelm. Each year I gather more recipes designed to handle the glut and each year I fail to try them, leading to a compost bin laden with food waste. Yes, I am to blame for all that.

So this year, for the benefit of all, I thought I'd do a season of courgette recipes. Even so I don't suppose for one minute I'll be able to eat all results but I'll have a better idea about what might work for company.

I'm heading into the kitchen today get started on this. Back soon.

Monday, June 08, 2015

Banana Bread revisited

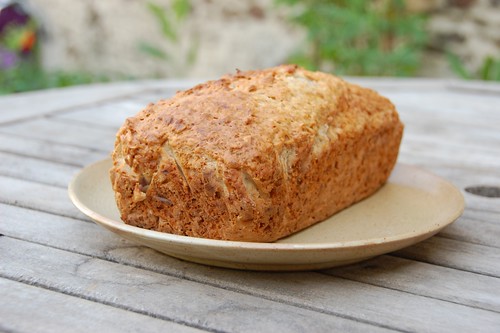
I forgot a bunch of bananas this week so had need of my banana bread recipe and went back into the archive to retrieve it. Originally posted July 2010 it's definitely worth coming back to again and again.

============================================

banana oat bread

Remember all those bananas I bought at a bargain price the other day. I've made six loaves of this bread from them since then, using 18+ bananas and there are still bananas in the freezer and all the fruits that were eaten by guests in the interim. Didn't we do well?

This bread isn't a world shattering revelation of a recipe but it's tremendously popular - which is just as well, really. The method is simple and the basic bread would lend itself to all sorts of innovative additions if you had a mind to it although the novelty of the basic banana flavoured loaf hasn't worn off yet in this house.

It's also packed full of oats which render it positively healthy as a food. What are you waiting for - make it now!

You will need:

290g flour - I have used plain white and a fine wholemeal, both work
100g granulated sugar - white, brown, Demarara or muscovado, your choice
1/2 tsp. salt
11g baking powder, see method
150g rolled oats
3 ripe bananas (or 4, see method)
125ml non-dairy milk (or water)
25ml light flavoured vegetable oil

1 9x5 (2lb) loaf shaped baking tin

Mix together all the dry ingredients. The oats I've been using are jumbo oats but Quaker porridge oats would also work. Don't use instant porridge powder because I think it would be horrible.

100g of sugar is plenty in my opinion but you can bump it up to 125g if you have a sweet tooth.

Salt is always optional.

Baking powder - people get so worked up about their raising agents. In France levure chimique is sold in little sachets containing 11g. This is plenty to raise this loaf. If you don't have a sachet, two flat teaspoons of baking powder is sufficient. If you don't have baking powder then mix together 1 teaspoon of bicarbonate of soda (sodium bicarbonate) with 2 teaspoons of cream of tartar (potassium bitartrate), use 2 teaspoons of this in your loaf and throw the other one away! Simple, non?

In another bowl mash the bananas until gloopy. Mr. Stripey likes to find bits of actual banana in his bread and this is what the fourth banana is for. Don't mash it, add it in little bits just before the batter goes into the tin.

Add the milk (or water, nobody ever died from using water instead of soy milk in banana bread) and oil to the banana mush and stir together. Then add the whole lot to the dry ingredients and mix well to combine. It should make a nice wet batter, add a very little extra water if you feel the mix is too stiff.

I line my tin with a piece of baking paper, just the long sides and bottom but you can grease the tin if you prefer.

Put the batter into the tin, rap the filled container on the work surface to settle the mix and bake in a medium hot oven, about 180C for 50 minutes to an hour. I'm sorry that's a bit vague but the oven here isn't exactly temperature controlled. Test your loaf after 50 minutes with a skewer and if it comes out a bit wet with uncooked batter be prepared to give it the full hour.

After cooking, allow to cool in the tin for 10 minutes and then finish cooling on a rack. It doesn't cut well warm but is nicest fresh from the oven. If you keep it in a sealed container or plastic bag it will slice more cleanly on the second day but the slices are still a bit crumbly. This hardly matters as you'll need to break it into pieces to cram it into your mouth.

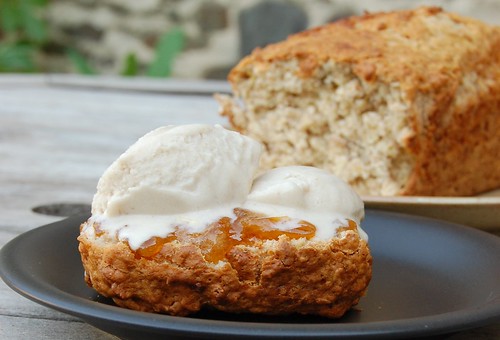
Served with apricot jam and banana icecream it's a pretty good pudding too.

banana bread with banana ice

Banana Oat Bread

banana oat bread

Remember all those bananas I bought at a bargain price the other day. I've made six loaves of this bread from them since then, using 18+ bananas and there are still bananas in the freezer and all the fruits that were eaten by guests in the interim. Didn't we do well?

This bread isn't a world shattering revelation of a recipe but it's tremendously popular - which is just as well, really. The method is simple and the basic bread would lend itself to all sorts of innovative additions if you had a mind to it although the novelty of the basic banana flavoured loaf hasn't worn off yet in this house.

It's also packed full of oats which render it positively healthy as a food. What are you waiting for - make it now!

You will need:

290g flour - I have used plain white and a fine wholemeal, both work
100g granulated sugar - white, brown, Demarara or muscovado, your choice
1/2 tsp. salt
11g baking powder, see method
150g rolled oats
3 ripe bananas (or 4, see method)
125ml non-dairy milk (or water)
25ml light flavoured vegetable oil

1 9x5 (2lb) loaf shaped baking tin

Mix together all the dry ingredients. The oats I've been using are jumbo oats but Quaker porridge oats would also work. Don't use instant porridge powder because I think it would be horrible.

100g of sugar is plenty in my opinion but you can bump it up to 125g if you have a sweet tooth.

Salt is always optional.

Baking powder - people get so worked up about their raising agents. In France levure chimique is sold in little sachets containing 11g. This is plenty to raise this loaf. If you don't have a sachet, two flat teaspoons of baking powder is sufficient. If you don't have baking powder then mix together 1 teaspoon of bicarbonate of soda (sodium bicarbonate) with 2 teaspoons of cream of tartar (potassium bitartrate), use 2 teaspoons of this in your loaf and throw the other one away! Simple, non?

In another bowl mash the bananas until gloopy. Mr. Stripey likes to find bits of actual banana in his bread and this is what the fourth banana is for. Don't mash it, add it in little bits just before the batter goes into the tin.

Add the milk (or water, nobody ever died from using water instead of soy milk in banana bread) and oil to the banana mush and stir together. Then add the whole lot to the dry ingredients and mix well to combine. It should make a nice wet batter, add a very little extra water if you feel the mix is too stiff.

I line my tin with a piece of baking paper, just the long sides and bottom but you can grease the tin if you prefer.

Put the batter into the tin, rap the filled container on the work surface to settle the mix and bake in a medium hot oven, about 180C for 50 minutes to an hour. I'm sorry that's a bit vague but the oven here isn't exactly temperature controlled. Test your loaf after 50 minutes with a skewer and if it comes out a bit wet with uncooked batter be prepared to give it the full hour.

After cooking, allow to cool in the tin for 10 minutes and then finish cooling on a rack. It doesn't cut well warm but is nicest fresh from the oven. If you keep it in a sealed container or plastic bag it will slice more cleanly on the second day but the slices are still a bit crumbly. This hardly matters as you'll need to break it into pieces to cram it into your mouth.

Served with apricot jam and banana icecream it's a pretty good pudding too.

banana bread with banana ice

Monday, May 18, 2015

Chickpea meringue

Goose Wohlt experimenter, engineer, and food lover from Muncie, Indiana, US, is credited with vegan meringue but he got the idea from
The fuel for the aquafaba revolution came out of France with a Le Défi FUDA chickpea challenge video that brought into the light Joël Roessel's 2014 discovery of the foaming action of chickpea liquid. from Aquafaba site

Thursday, May 14, 2015

Cooking in a chiminea

This is a rather picture heavy and recipe short post. For Christmas I was given (from my wish list) a cast iron chiminea; I envisaged it providing a welcome shot of heat on those wonderful summer evenings when it's too nice to go indoors but the sun has been down a touch too long for comfort. Like any new toy it has both foibles and features.

chiminea and wood

The drawbacks have been mostly mechanical, the fire grate bars are too widely spaced and allow many of the smaller embers to fall through before they're done, the mechanism for controlling air flow seems to be purely decorative and like most fires nearly all the real heat is lost up the chimney. It doesn't like damp wood, or large wood, or natural charcoal because the small irregular bits fall straight into the ash but when it's happy it does burn quite well.

The feature, that I didn't think we'd ever want to use, is a cooking surface, made of iron that swivels on a pin in and out of the firebox. It didn't seem a practical way to cook for a barbecue where it's traditional to cook vast quantities of food for serving to a crowd but with a change of focus I realised that for two of us it was perfectly adequate and much nicer in a way, cooking together at the side of the dining area instead of having one person on constant duty at the roaring barbie.

So I planned a tasting menu, several small plates each cooked with different implements to test as many chiminea cooking possibilities as I could in one meal.

aspargus parcel on fire

It's quite difficult to keep a steady heat going, charcoal might be easier but we need to get some briquettes or change the grate for one with narrower spaces. Paul had to chop more wood twice during the meal as the small pieces burned up so quickly. A double wrap of foil helped protect this asparagus in vegan spread and balsamic vinegar from burning before it was cooked.

cooked asparagus

This was the last asparagus we can take from the garden this year, it was delicious.

skwered mushrooms

Mushrooms on skewers were next. The blackened leaves are mint that in the end didn't contribute much but the mushrooms were tender and not too sooty.

mushrooms in sauce

They were served with a peanutty saté sauce.

onions with oil and balsamic

Skewered onions didn't work quite as well as I hoped. I was trying to recreate a dish we'd had in a Turkish restaurant in Bedford but a more concentrated heat is probably needed to caramelise the onion petals and oil and balsamic vinegar not a very good substitute for pomegranate syrup which isn't readily available in deepest Normandy.

Aubergine in a cage

Aubergine steaks in the cage. They were marinated in kimchi  juices and scored before cooking.

Aubergine served

Served with chopped kimchi and a borage flower. I liked this but it wasn't quite right and again cooking the vegetable all the way through without burning the outside was difficult.

sausage and potato in a de buyer pan

A sort of campfire sausage and potato fry up came next. The potatoes were parboiled and sausages a couple of the home made gluten sausages in the previous post rescued from the freezer. My excellent little de Buyer cast iron pan (another Christmas present) fits nicely but always remember to have an oven glove handy when cooking in iron over an open fire.

It was served with a rhubarb tzatziki that wasn't photographed.

bananas in their skins

The traditional end to many barbecues, bananas in their skins straight over the fire. We ate these with a brandy infused syrup.

Although the preparation was just as intense as any ordinary barbie the actual cooking and eating experience was much more laid back with only the need to photograph adding complications. Worth doing again.


Thursday, April 30, 2015

Sausage inna bun

sausage inna bun

Made some gluten sausages this morning from the excellent PPK recipe except I substituted the beans with some leftover Mexican style rice from my dinner last night and the fennel seeds (which are a truly excellent and inspired flavouring) with some more cumin and rosemary as my fennel had gone mouldy. Yes, it's hard being a food snob in rural Normandy. I also made the mix into eight smaller sausages because I find solid gluten a bit intimidating in quantity and only take lonely solo meals. If you don't have white beans or leftovers you can also use chickpeas or even frozen green peas instead. I know this, because I've done it.

Anyway, it all worked beautifully and my split sausage filled a quarter baguette nicely. Cheers.


Sunday, March 01, 2015

Oranges of Seville (revisited)


A trip to the garden centre today turned up some end of season Seville Oranges.  They looked in good order so we bought some and I'll be making marmalade this year after all. Here's the recipe I always use, as excellent now as it ever was.


=========== First published Jan 2008 =============

Marmalade is a peculiarly British thing. The French have an orange jam but it's nothing like the robust, slightly bitter, jellied spread that Brits adore with their breakfast toast.

January is the month of Seville oranges and, since due to an oversight, I'm in the UK at the moment I'm not sure if they're in the French shops or not but here, we made a special trip to a local supplier to secure our stocks for this year's marmalade.

The method I've used for longer than I care to remember is an adaption of a recipe from Farmhouse Cooking, a book of the TV series from way back in the 1970s. I looked it up again as research for this post and was surprised to discover just how far I've deviated over the years. The original recipe calls for a pressure cooker which I don't have and 50% more sugar than I use. Still, the reason I started using it was because the fruit is cooked whole, which in my opinion is a really sensible way to go about it, preserving all the juice and making slicing the peel into shreds easy peasy.

peelsboils

So for 7 or so jars of marmalade you'll need about 7 Seville oranges, a lemon, 1.7 litres water (that's three pints!) and 2kg sugar.

You'd be hard put to find a recipe for marmalade that doesn't include a lemon. It's really not necessary if you've got proper bitter Sevilles but I've decided I quite like the lift a small amount of lemon peel gives to the finished product so if I have one handy then I usually include it. The total weight of fruit I used was 1.2 kg.

Scrub the fruit really well, especially around the stem end, then put it into a really big saucepan (I make jam in a 9 litre pan) with the measured water. You should have just enough water to submerge the fruit although as it tends to float it won't look as if it's enough. Bring to a simmer and cooked, covered, for about 45 minutes or until the fruit is completely soft. If you have a pressure cooker and you want to do it that way then reduce the water by a tad, and cook for 20 minutes at 15 pounds.

Remove the fruit from the hot liquid keeping the water in the pan, drain (reserve the drips and return to the pan) and allow to cool for a while. The next stage can be done while the oranges are hot but it's dangerous work. A hour's cooling should be sufficient but you can leave them overnight if necessary.

Cut the fruit in half and scoop out all the seeds and pulp with a spoon. Put the scooped out bits back into the saucepan with the reserved liquid. Bring this back to a gentle simmer for 15 minutes while you chop the peels as you prefer. I usually do long thick shreds but you can cut it as thick or thin as you like. A cross cut to bring the shreds into cubes can be good and makes spooning the marmalade out of the jar and spreading a bit easier.

When the pot of water and seeds has had its simmer, strain the whole lot through a nylon sieve or jelly bag to remove the seeds. You can rub the pulp through to collect all the orange flesh you like although for a sparkly clear marmalade you shouldn't really squeeze too hard. You should be left with a couple of pints of richly orange flavoured and pectinated liquid.

Put the liquid and the sugar back into the pan and stir well to dissolve the sugar. Then add in the peel and over a gentle heat bring everything back to a boil stirring continuously as you do.

Boil hard for 10 minutes, you shouldn't need more time than that and test for a set on a cold plate. Remove from the heat and divide into your sterile warmed jars. A jam funnel is really useful because of the shreds of peel which can be wayward about going into their pots. Use a ladle and fill all the jars one ladle at a time, this gives the preserve time to cool and stops all the peel rising to the top as it sets. Seal while hot.

spreads